
***PLEASE NOTE: We recommend using royalty free music unless you have the rights to the music you wish to use***
Music On Hold can be any audio file you would like to play while a customer is waiting...
- On Hold
- In a Queue
- In a Parking Lot
You can find Music On Hold on the Main Menu Bar at the top of the screen

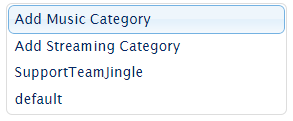
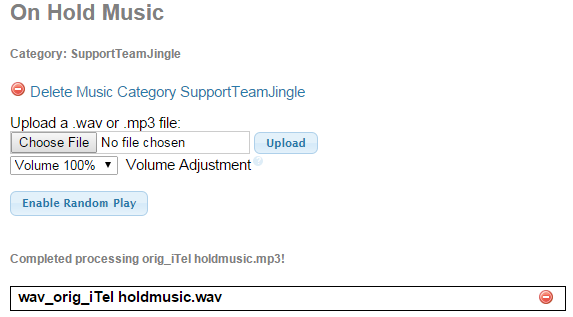
On the right-hand side there is a list of all the Music Categories, including the default one. A Music Category is a group of audio files and must contain at least one audio file in the mp3 or wav format. A Category can be specified in various applications so the system knows when to use that audio.
Add a Music Category
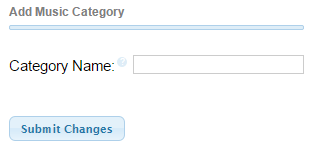
- Click Add Music Category from the right-hand menu
- Specify a unique and meaningful name for the Category and hit Submit Changes
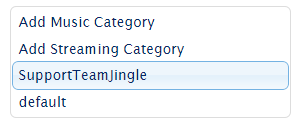
- Select your new Category
- Click Choose File and select an audio clip (mp3 or wav) for the Category
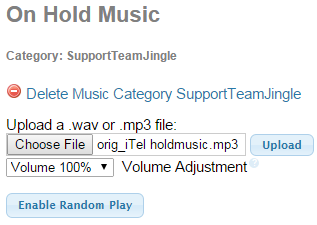
- Click Upload - it will show a Completed message once finished along with any files that have been uploaded. You may upload as many audio files into a category as you wish
Streaming Categories
- Find an MP3 stream that you would like to use (we recommend using a low bitrate stream to minimize your bandwidth usage). Make a note of the streaming URL because you will need it later on.
***Note: If you are using a site like Shoutcast.com, you will need to download the playlist (.pls) and then open the file in a text editing application to capture the streaming URL
(i.e. File1=http://randomstreamaddresshere)*** - You will also need a program called MPG123.
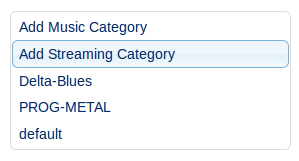
- Now on your PBX, go to Music On Hold (may be under Settings > Music On Hold)
- Next you will select 'Add Streaming Category'
- Enter a Category Name that easily identifies the stream. You will also need to enter the following string:
/usr/bin/mpg123 -q -r 8000 -f 8192 --mono -s http://randomstreamaddresshere
***Please Note: "http://randomstreamaddresshere" should be the streaming URL for the stream you have selected***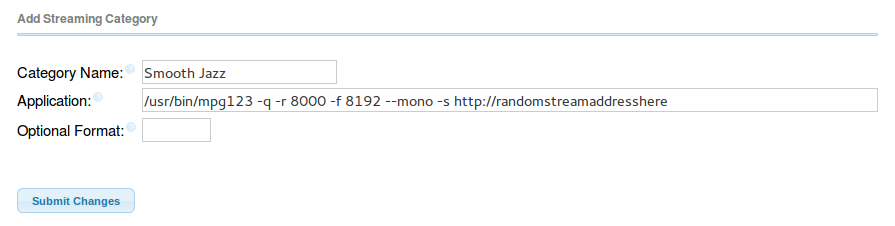
- Click Submit Changes and then make sure to Apply Changes. You're done!
For the final chapter of this guide, see Chapter 9 - User Panel
Comments